

Hola!
Today we thought we would share a diy that shows you how to make your own screen print. Ahhhh, screen printing, how we love you so! Often there are things we want to make and do with this incredible process, but studio time and the cost of materials can often hold us back. Most importantly, sometimes you have the urge to make it RIGHT AWAY - often an issue here at Vivid HQ :)
Fret no more, here is a quick way to make your own one at home. Made with cheap and easily come by materials, it may not be as perfect as the real thing, but it has great character and still works a treat...

You will need:
Old tights (stockings/hosiery)
Modge Podge glue
Fabric paint or normal paint depending on what you're printing onto
An embroidery hoop
Some card
A Sharpie
A paintbrush for your glue
And a paintbrush for your paint
.... and whatever you want to screen print onto of course
Ready? Lets go!

First up you will need to make your screen. Unscrew your embroidery hoop and put the smaller circle into one of the legs in your tights, leaving a little excess material at each end. Then chop it off! Screw it back into the larger hoop and pull it taught on one side of the circle. You will need it to be as tight and stretched out as possible for printing or it will go all wonky. Then slice the back (baggy part) in half and trimm off the excess material. Pretty sexy screen, huh!

To get your image onto your screen you will need to start by using the sharpie marker and tracing it right onto your tights. If this is your first try, I would recommend starting with something simple so you can get the hang of it. As you will be lying the side of the hoop with the material stretched out directly onto your image for tracing and then onto your material for printing, you don't need to worry about backwards letters or anything. Hooray! So pop down whatever you want to print and go round it all with that Sharpie marker...

Hola indeed!
It doesn't matter if it is a little bit scrappy as you will just be using this as an outline. Thank goodness ;) Next, you will need to apply your Modge Podge glue...

Apply the Modge Podge wherever you don't want your paint to go. For instance, I only want colour in the speech bubble, so I have used my paintbrush to put the glue all around the outside of the bubble and I have used it to carefully fill in those cute letters. The glue creates a waterproof seal which will stop the paint from seeping through. Brilliant, right?! So, make sure you take your time to fill in your gaps, then let it dry till it goes all clear.

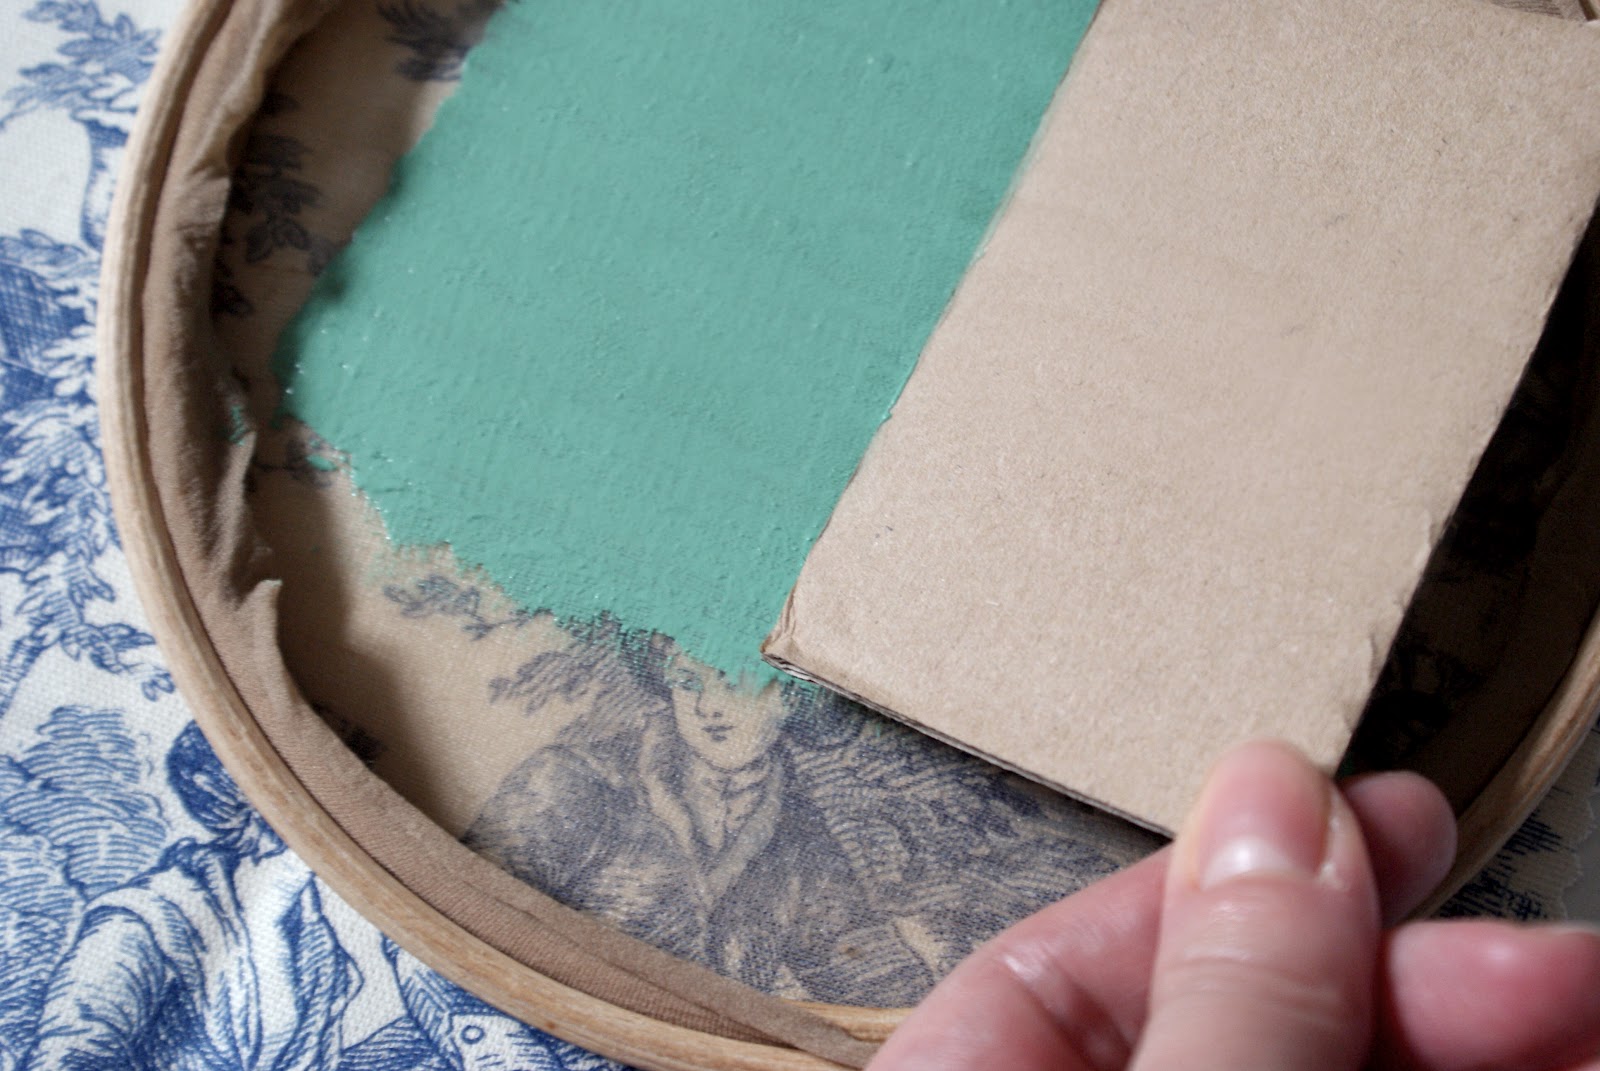
All dry and good to go? Winner! So get your material out. You can use fabric paint if you are printing onto fabric, or just normal paint if you are using paper or canvas etc. To set it up, all you need to do is put it underneath your screen; remember, you will be applying your paint inside the hoop. To print, you will be scraping your paint straight across the tights in one smooth, straight movement. Using a piece of card, apply a thick layer of paint at one side as shown above...
When you turn it upside down and pull it across the screen, the paint will roll down from the card and create a block of colour where there is no glue.... Like MAGIC!

*TA*DA*
Look at that! Isn't it awesome? I think I could do this all day long :D Just remember to take your time and have enough paint ready to cover the print in one movement as you don't want to try re-applying. The more you touch it when working with it, the more likely it will move and get smudged. When you're done you can give it a wee rinse with cold water and either use a different colour or save it for another print-a-thon. How great is that?!

We'd love to hear what you would love to make and hope you enjoy working with your new screen printing kit :D xox

o_O This is awesome! Thank you so much! I absolutely MUST give this a try soon! I'll gather my pocket change, get the supplies and give it as good a go as I possibly can! I'll show you the results ^^
ReplyDeleteAwesome! You are very welcome, It's great to share a tutorial that inspires so much :D
DeleteLooking forward to seeing how you get on too :) Love it!!
Such a neat and easy to do trick, I think I will have to try this and I know just the item I want to do it on! lol
ReplyDeleteHooray! Pleased to hear it Mohala :D Good luck!!
DeleteI've been wanting to try screen printing, but the start up cost seemed like so much. This seems like a great way to try it out on the cheap. Thank you!
ReplyDeleteAww, brilliant! We're so glad to hear that Ariella, it's a little fiddly but a lot of fun :D
DeleteGood luck!
This looks awesome.....is it possible to use any glue like, instead of the one you used above?
DeleteYou need to use a white glue, so any kind of pva would do. Pritt stick and superglue etc would be a total no no as they will stick it to a surface rather than fill up the holes. I hope that helps!
ReplyDeleteThanks and good luck :D
Oh My Goodness!!!! I love this idea!!! I can't wait to try it for myself!!! Thank you!
ReplyDeleteHooray! Thanks Rebecca! I hope you have a lot of fun experimenting!
DeleteGreat tutorial...thanks for sharing it!
ReplyDeleteNo problem Cadisch! Glad you enjoyed it :D
DeleteAbsolutely beautiful post : ) I've been in the industry for years and have been blogging for a long time too, so I know a great post when I see one! Keep up the great work! Thanks for sharing too, haven't seen a screen printing circle screen like this before, pretty cool!
ReplyDeleteAww! Thanks so much Marcelo :D That really means a lot to me - you've just made my week!
Delete