

We have been obsessed with matchbooks for some time now. And we are also obsessed with notebooks. On top of that, we cannot get enough of tiny wee things! So, what do we do to itch that scratch? Make tiny wee matchbook notebooks of course! And today we are going to share our fun new diy with you... Awesome, right?!
This tutorial requires only a few simple items and about 15 mins of your time. Cracking!
You will need some decent blank paper for your doodles, some thin card, some pretty paper for the cover and to bind it all a sewing machine ... but if you have a stapler handy, you can use stapels to hold it all together... however you wont be able to rip pages out to give to your friends as well!
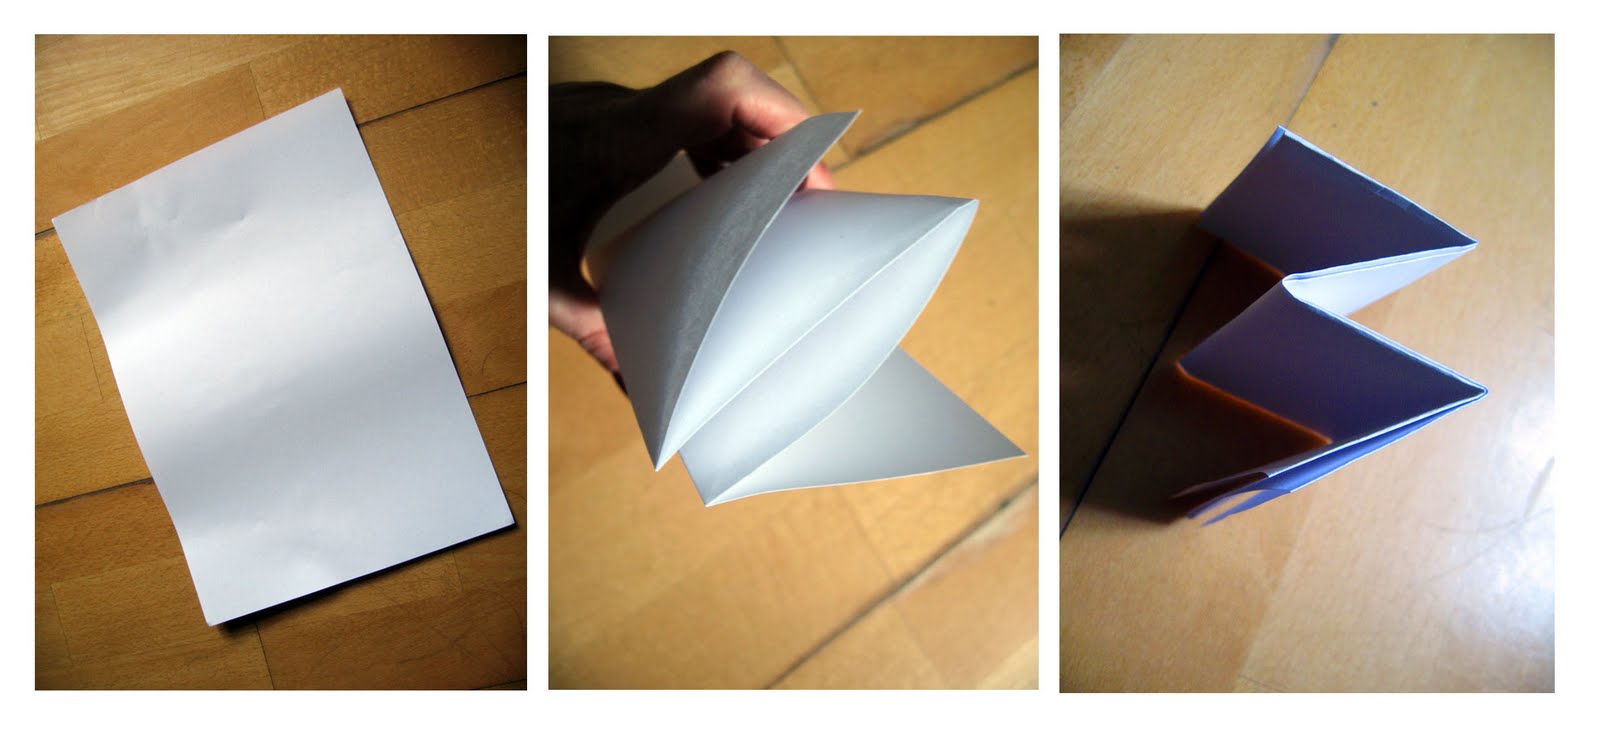
To start, take your sheet of paper and concertina into 4 equal sized vertical strips. Then concertina again on the horizontal so it looks like a small M. You can make your pages as large or as small as you want to; we found that this folding technique was the quickest and simplest to get lots of paper the same size quickest. Win! We found one sheet of paper was ideal to make small matchbook notebooks as it needs to be able to fit through the sewing machine. You may want to check how much your machine can take before you cut any more than that!

Next you want to chop them all up. Here at Vivid HQ we are lucky enough to have a guillotine, but those not as fortunate can use scissors and an ad break to get your sheets ready. Once you have a pile on the floor, pick them up neatly and use a bulldog clip to hold them together. Efficient!

For the outer cover of your notebook you can either use some pretty paper and some thin card or a piece of decorated / customized card... we are using music sheets today so have some thin card to put behind it to make it a little sturdier; we don't want to get it all crushed in our pockets after all...
Firstly, measure around your new note paper. You will need to measure out enough card to fold over the paper pad comfortably including a lip at the base for stitching. Remember you will be tucking in the front; it is easier to make this strip too long at first then trim to size than guess here! Make sure to add in a few millimeters on each side of your pad to make sure it doesn't get bashed in your bag. Cut out the card first and use it as a template to cut out your pretty paper cover as you don't want it to be too tight.

Next, glue the card and your paper together, making sure there is no bubbles.
Phew! You are so far along already!
Fold up the base of the cover to create a lip for the paper to be tucked into. Make sure to make it reasonably deep as you will need to stitch here too. We recommend using your bulldog clip to hold everything in place so you don't have to worry about what goes where when you are playing around with it. Then fold down the top...

As you can see from that first image we have a little overhang. Thats ok because we can trim it to size.. Make sure to cut this so it will be able to tuck into the bottom lip; it doesn't need too much to stay in place so have a little play to see what you think looks best.
Then to zip it through your machine, use a short straight stitch on a tight setting, to stitch all of the paper into the cover. Sit the paper inside the the bottom of the lip for this part and make sure it is all lined up as there is no turning back after this step! Try not to stitch too close to the bottom you you need to leave enough space for the cover to be tucked into too. Finally, you only need to stitch for the length of the paper. We all love back stitch so remember to do one at the start and end of everything that you are making :)

*TaDa*
Oh My Goodness that is pretty. And practical too! Who wouldn't be proud of this little project, right? And what is lovely about it is that you can make them as big or small as you like, you can customize them, use recycled paper and cool packaging to make them
... and you can keep all of your ideas in them too! Hooray!

We hope you found our tutorial helpful - if you have any questions let us know...
Happy doodling everyone!
LOVE these! What a wonderful idea!
ReplyDeleteAwww! Thanks so much Emma! We love them because you can make them with absolutely anything and that makes them super cheap. What a win! Hee hee
ReplyDelete